Arrowtic WordPress Documentation
Thank you for purchasing Arrowtic - Digital Marketing Agency WordPress Theme and choosing our theme for your web development needs. This documentation will provide you with all the details you need in order to use this WordPress theme. If you are unable to find your answer here in our documentation, feel free to ask for help from our support team, all you have to do is sending an email to us: johanspond@gmail.com
If you like this theme, Please support us by rating us 5 stars
Thank you. Johanspond
Arrowtic Wp - 1.0.3
1. About Arrowtic Theme
Arrowtic is a full featured premium flexible WordPress Theme for your Digital Marketing Agency. We looked over last trends in web-design when creating this theme. Arrowtic optimized for agency, business, consulting, content marketing, digital marketing, creative agencies and any kind of web design companies.
2. Install Theme
Download packages:
Purchase Arrowtic theme from ThemeForest then you can download our template package from there. Extract package the include all files and folders of theme. When done, you should see arrowtic.zip (zip file name can be changed from version to version).

Once the download is complete, unzip the file and you will see the following packages:
- Docs - our detail documentation for the theme
- Sample - the sample data of the demos, you can import it Manually.
- Theme folder - for manual installation
System Requirements:
When selecting a hosting service, you should check to see that these server requirements are provided and installed on their web servers:
- PHP version 5.6 or greater
- MySQL version 5.6 or greater
Theme Installation :
There are 2 ways to install a WordPress theme. Both ways will allow you to easily upload and install the WordPress theme files for a quick and easy setup.
Installing Theme from the WordPress Dashboard
- Log into your WordPress Dashboard (admin area)
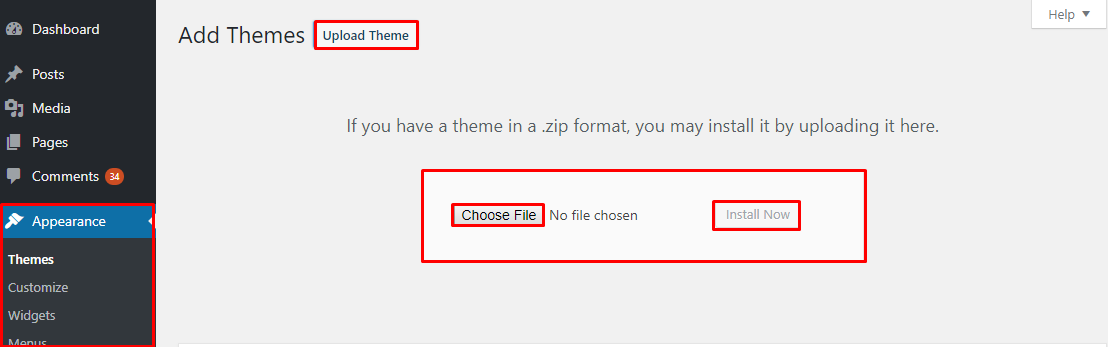
- Navigate to Appearance Themes
- Click Install Add New
- Click Upload Theme
- Now you just need to find the “arrowtic.zip” in the Upload folder and hit Install now.
- After Installed then click Active Now
If you are experiencing any issues during the installation I would recommend to check out this Screencast by Envato
Install theme via FTP
The second option how to install this theme would be the upload via FTP manager. It really doesn’t matter which of the two ways you choose, just choose the one you feel more comfortable with.
- Login to your FTP account and navigate to your WordPress installation directory
- Navigate to the folder /wp-content/themes
- Upload the “arrowtic” folder (not the .zip-file). This is the folder located inside the “Upload” folder in the zip-file you’ve downloaded from Themeforest.
- Now log into your WordPress admin area
- Navigate to Appearance Themes
- You found the theme and click Activate
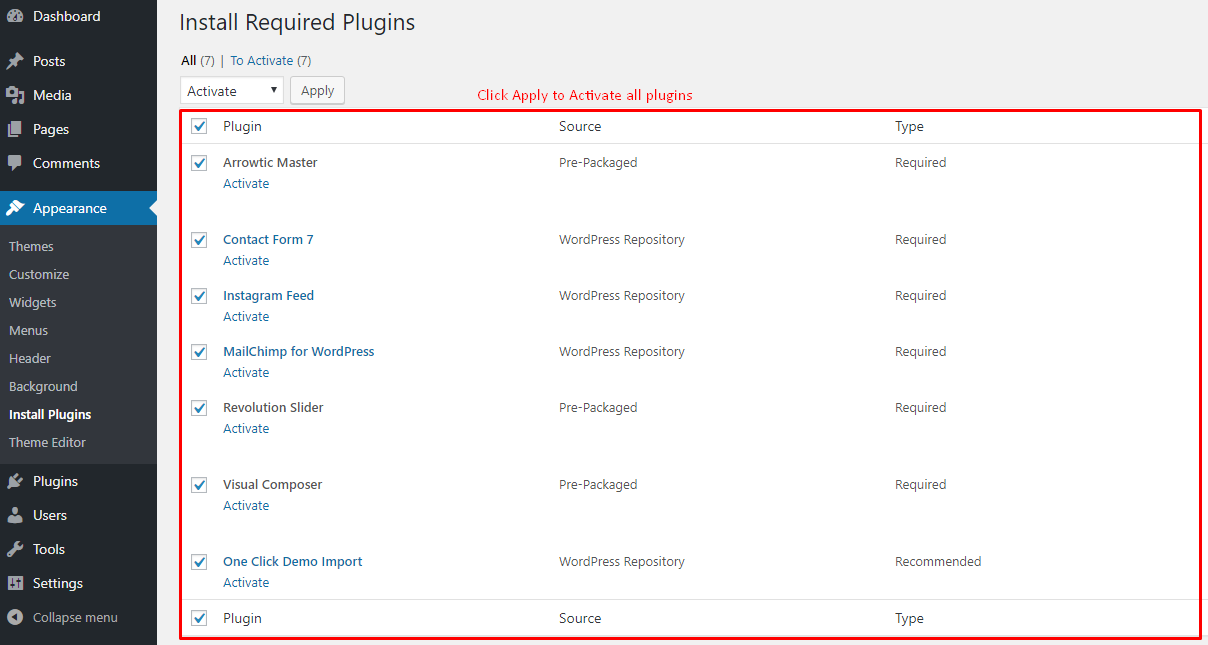
3. Plugin Installation
Right after the theme is activated, a notification at the top of the screen will suggest to continue with the installation of the plugins recommended for getting the best of your theme. Installing process is very simple, you just need to click Begin installing plugins and you will be redirected to the plugin installation page where you can install Plugins.
Plugins Using in Arrowtic theme
- Arrowtic Master
- Slider Revolution
- WPBakery Page Builder
- Contact Form 7
- MailChimp for WordPress
- Instagram Feed
- One click demo import
Step 1: Click ‘Begin installing plugins and select the plugins you need to install from the list.

Step 2: Select all plugins then choose Install, Click Apply to install all plugins
4. Install Demo Data
Navigate to Appearance->>Import Demo Data >> OneClick Demo
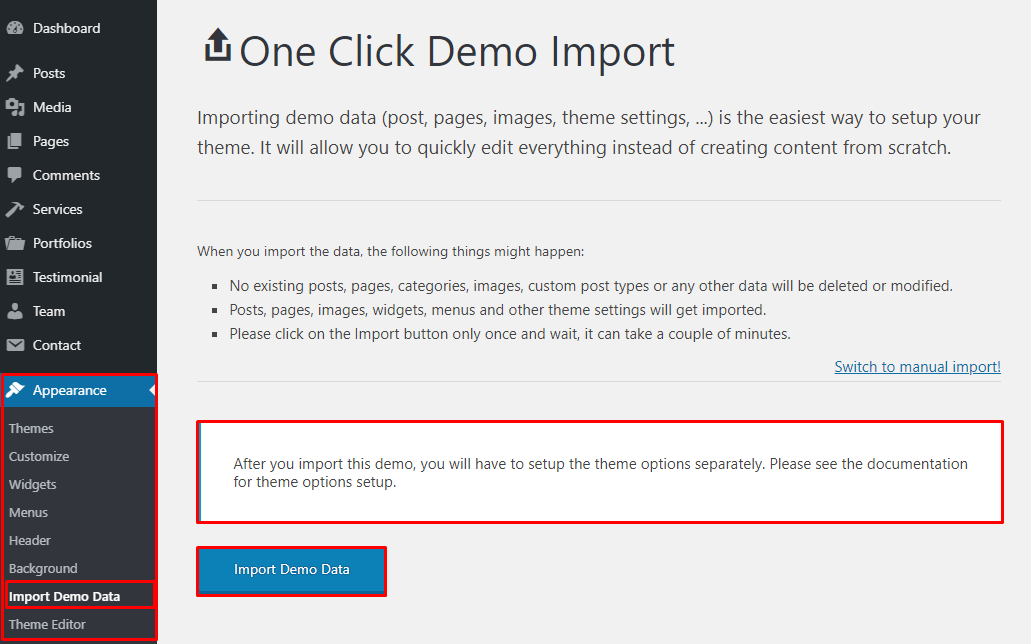

After you import this demo, you will have to setup the theme options separately. See the documentation next step for Theme Options Setting
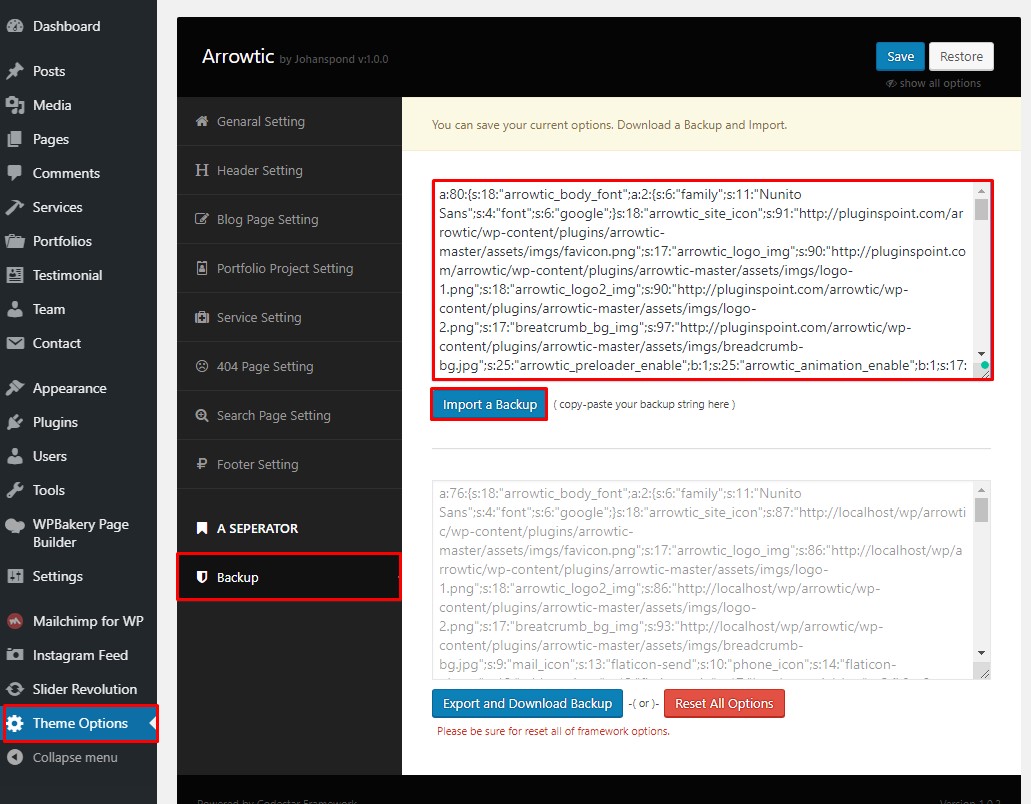
# Import Theme Options Data
Navigate to Theme Options->>Backup >> then paste your theme options data in the blog & click Import button.
Theme Options data location >> go to download package >> sample >> data folder then open the (options.txt) file any editor. just copy all code and import theme options data.

5. Theme Configuration
Upload Favicon, Logo and Enable/Disable Preloader.
You can upload your logo image in the Arrowtic Theme Options. If the logo is not uploaded, then your site name will be used. Please, follow the steps below to upload your logo:
- Step 1 - Login to your WordPress Dashboard.
- Step 2 - Go to Theme Options > General Settings
- Step 3 - Upload your logo by clicking on Add Image.
- Step 4- Upload your favicon (should be a 80px x 80px PNG/GIF image)
- Step 5- Enable/Disable Preloader by click the switch.
- Step 6- Enable/Disable Site animation by click the switch.
- Step 7- Enable/Disable Site Smooth scroll by click the switch.

Set Up Menu
1. Creating your menu
- Step 1- Login to the WordPress Dashboard.
- Step 2- From the 'Appearance' menu on the left-hand side of the Dashboard, select the 'Menus' option to bring up the Menu Editor.
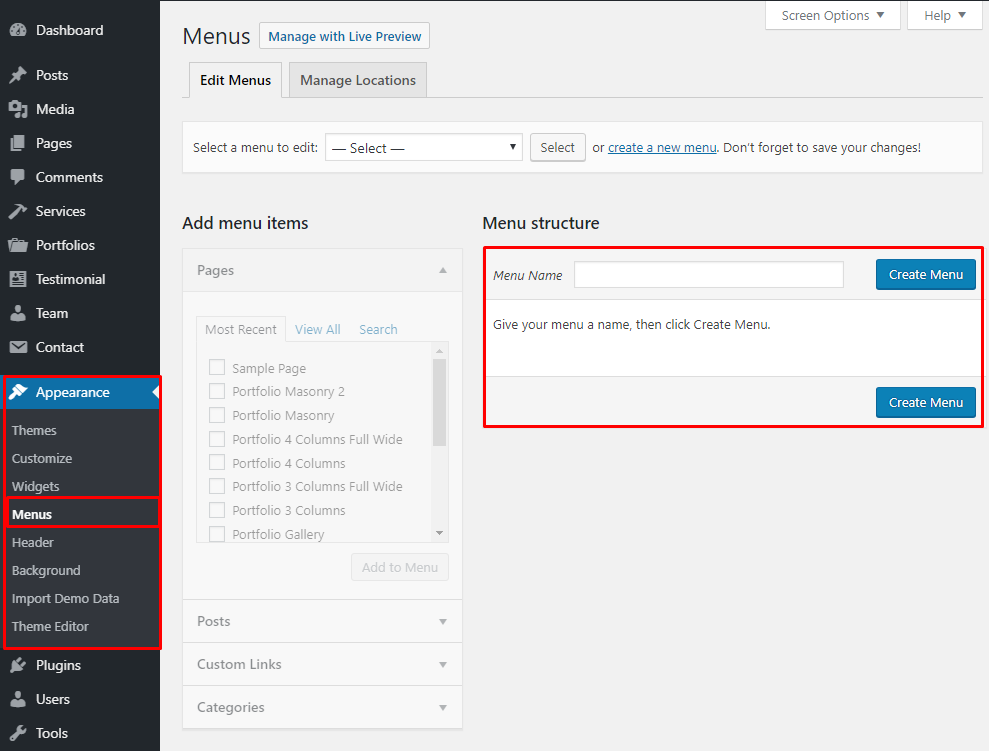
- Step 3 - Select Create a new menu at the top of the page.
- Step 4 - Enter a name for your new menu in the Menu Name box.
- Step 5 - Click the Create Menu button. Your menu is now defined, and you can now add pages to it (steps below).
2. Adding pages to your menu
- Step 1 - Locate the tab entitled Pages on the left hand side.
- Step 2 - Within this tab, select the View All link to bring up a list of all the currently published Pages on your site.
- Step 3 - Select the Pages that you want to add by clicking the check box next to each Page's title.
- Step 4 - Click the Add to Menu button located at the bottom of this pane to add your selection(s) to the menu that you created in the previous step.
- Step 5 - Click the Save Menu button once you've added all the menu items you want.

Your custom menu has now been saved.
The Screen Options allow you to choose which items you can use to add to a menu. Certain items, like Posts or Portfolios are hidden by default. The Screen Options are located in the top right corner of your WordPress Dashboard.

6. Set Up Home Page
You can quickly build a home page using Wpbakery Page Builder for WordPress that is drag and drop backend page builder plugin that will save you tons of time working on the site content. You will be able to take full control over your WordPress site, build any layout you can imagine – no programming knowledge required
From your Dashboard Admin Navigate to Pages
- - Select All Pages to see all page then click edit one page you want
- - Select Add New to create new page
# How to use Wpbakery Page Builder
Have you ever used Wpbakery Page Builder? Please follow that guide first: WPBakery Page Builder
- Official Plugin Documentation For More information about the WPBakery Page Builder check the official documentation.
- Watch video about WPBakery Page Builder
1. Drag and drop elements you need to build your page layout


How to use Back End Mode
- # Add and modify Row Layout
Step 1 - Go to your page / post, first activate the backend editor and click Add Element

Step 2 - Select the Elements you want to use.

Step 3 - Click on the Edit This Row (editor icon) to Edit the Row element (in our example we use row with 3 columns filled with text block)
![]()
Step 4 - To change the Row layout (number of columns) you need to click the second Icon from the left then select a layout or custom to make your own.

- # Edit Element
Editor Icon - To Edit Row, Column you need to click the Editor icon.

- # Duplicate Element
Pages Icon - To Duplicate Row or Column you need to click the Pages icon.

- # Remove Element
Close Icon - To Remove Row or Column you need to click the Close icon.

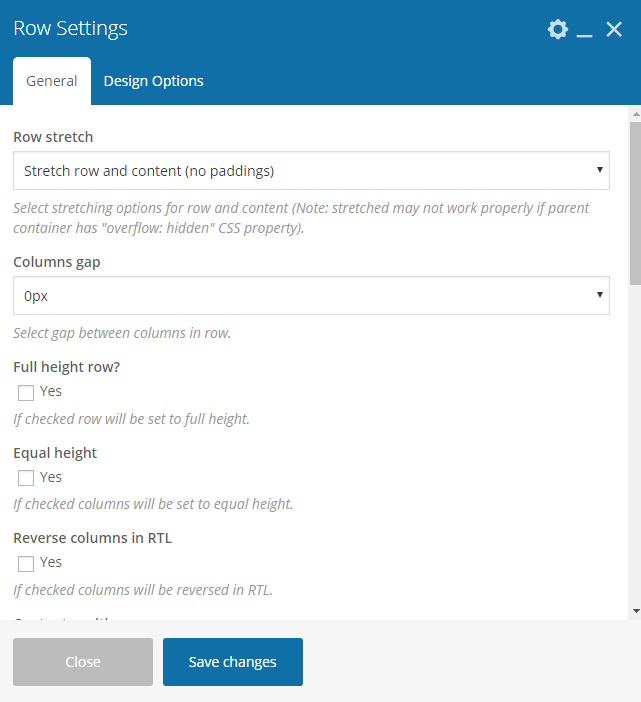
- # About Row / Column / Custom heading / Text Block Row Settings Options
When you edit row / column / custom heading / text block module, you can edit the row setting options.


Careate full width section
# Set a page as Home Page
- Step 1 - Go to Settings > Reading in your WordPress Dashboard panel.
- Step 2 - Set "Front page displays" to a "Static Page".
- Step 3 - In the drop-down menu for "Front Page" choose a page which will be your home page.
- Step 4 - Leave the drop-down menu for "Posts page" empty, as this is not used by the theme.
- Step 5 - Save changes.

# Set Up Blog Page
1. Create the blog post
- Step 1 - Log in to your WordPress Administration Panel (Dashboard)
- Step 2 - Click the 'Posts' tab.
- Step 3 - Click the 'Add New' sub-tab.
- Step 4 - Start filling in the blanks: enter your post title in the upper field, and enter your post body content in the main post editing box below it.
- Step 5 - As needed, select a category, add tags, post format settings below the editor.
- Step 6 - Upload a featured image for your Post.
- Step 7 - Select Post Format. You can create blog post with a lot of Formats like link, gallery or image. Select format on Format box from in right sidebar.
- Step 8 - Scroll down until you see the Featured Image settings box to upload single page images or create gallery.
- Step 9 - When your post is ready, click Publish.

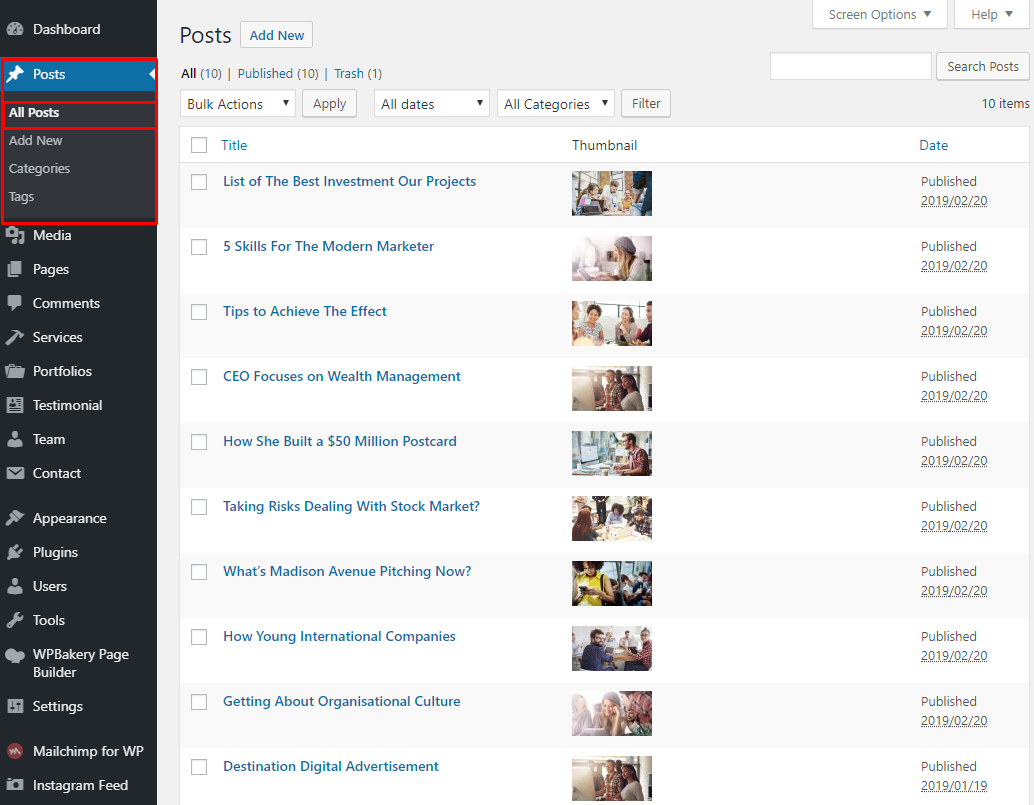
2. Manage current all blog posts
You can see all information of you blog post, add new, edit or delete them.
# Create New Page
Create New Page with Wpbakery Page Builder
- Step 1 - Log in to your WordPress Administration Panel (Dashboard)..
- Step 2 - Click on Pages > Add New.
- Step 3 - Give your page a name then Change the Editor (edit with Wpbakery Page Builder) to Backend Editor (you need to have the Wpbakery Page Builder plugin activated).
- Step 4 - Click on the Add Element button
- Step 5 - Select which Elements you want to use.

Choose page header Layout
Choose page footer Layout

# Blog Global Configure
- Step 1 - From your admin Dashboard navigate to: Theme Options > Blog Page Settings

# Create Service Item
Step 1: Go to Service from Dashboard then create content of Service

# Create Portfolios
Step 1: Go to Portfolios from Dashboard then create content of Portfolio

# Create Testimonial
Step 1: Go to Testimonial from Dashboard then create content of Testimonial

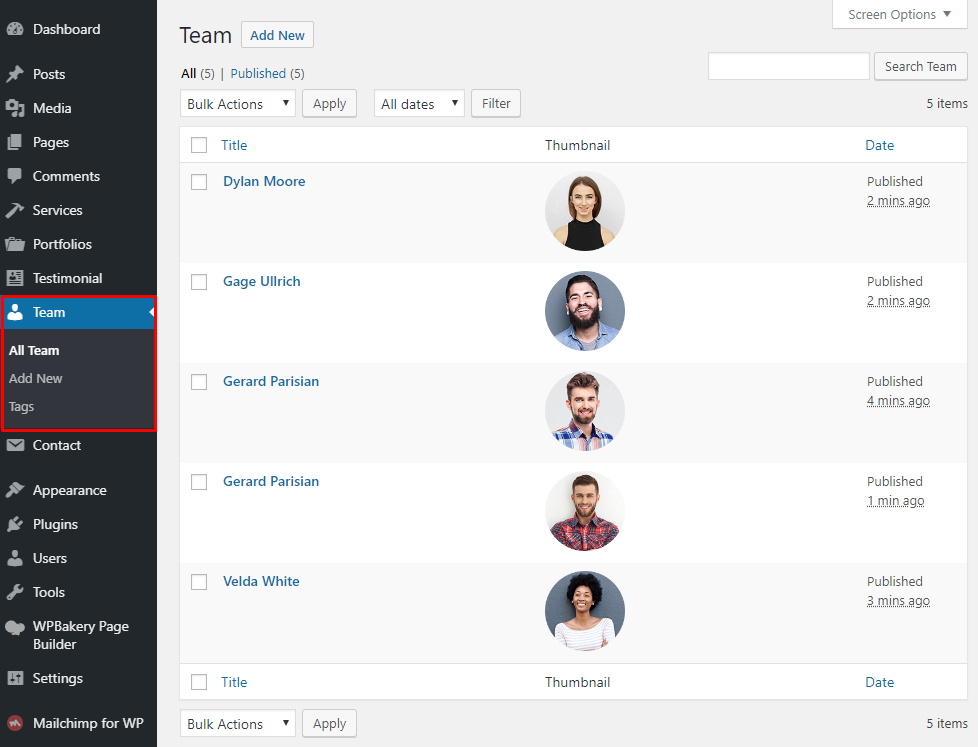
# Create Team Member
Step 1: Go to Team from Dashboard then create content of Team
# Create Contact Page
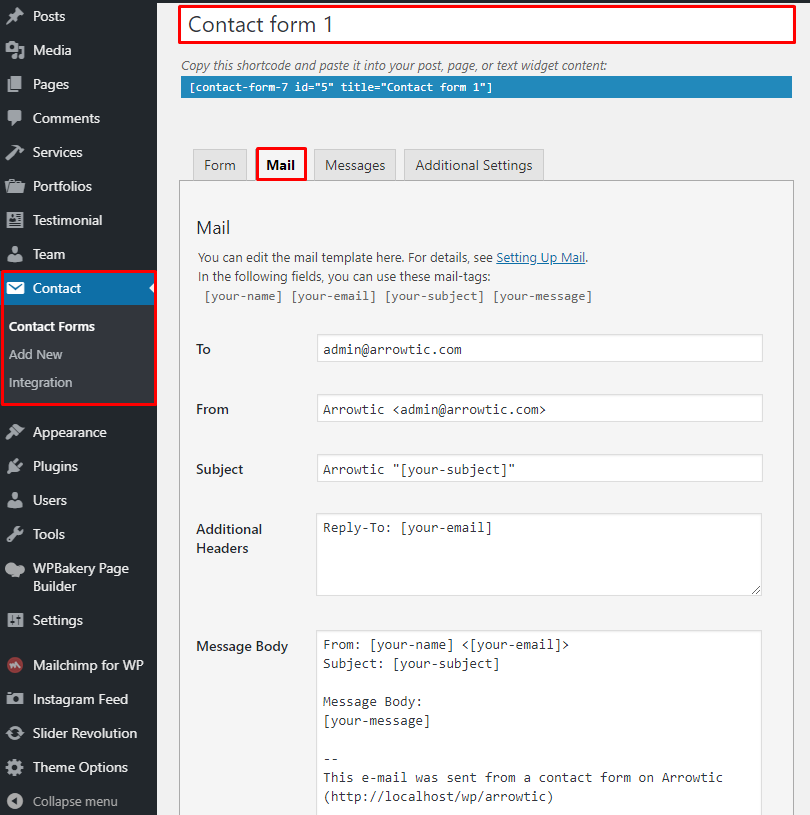
1. Create Contact Form.
Make sure you install and active Contact Form 7 plugin to continue reading.
- Step 1 - Log in to your WordPress Dashboard, go to Contact > Add New
- Step 2 - Give a Name to your form and change Mail Info
- Step 3 - Edit the Form field to change the Form Layout

7. Theme Options
Arrowtic Theme use Customizer provides an ultra-effective and intuitive way to customize theme layout & setting with real-time preview. Bring all of settings to customizer, you do not need to using another theme option anymore. To access Customizer, go to your admin Dashboard Navigate to Admin >> Theme Options
- 1. General Setting: Manage general setting like your logo,favicon, breadcrumb, preloader, font family, Page Animation etc.
- 2. Header Setting: Manage your header setting like your header top section, social icons & other information.
- 3. Blog Page Setting: Manage your blog page setting like page layout, blog post style, post layout style, Blog post content excerpt length, blog single page layout & single page share icon etc.
- 4. Portfolio Page Setting : Manage Project page setting like Project Filter Menu on/off, Project Layout, Post Per pages etc.
- 5. Service Page Setting : Manage Service page settings.
- 6. 404 Page Setting: Manage your 404 everything like text, button text, search text etc.
- 7. Search Page Setting: Manage your search page like text, button text, search text etc.
- 8. Footer Settings: Manage your footer settings like copyright text, fixed footer, footer background image etc.
- 9. Backup: You can easily Export or Import your Theme options demo data. If you want to import demo data. Please go to the >> download folder >> inc >> demo >> options.txt, This file open any text editor and copy to past below theme option backup import box.
8. FAQs
# How to update Theme
1.Update Theme via WordPress
Updating the theme via WordPress is very similar to the install process via WordPress. Make sure you had backup all of your customization in our theme. Follow the steps below to update your theme via WordPress:
- Step 1 - Download latest theme package on ThemeForest
- Step 2 - Log into your WordPress Dashboard.
- Step 3 - Go to Appearance > Themes.

- Step 4 - Deactivate the Arrowtic Theme by simply activating a different theme. Once you activate a different theme, you can delete the Arrowtic theme.
- Step 5 - Delete the Arrowtic Theme. Do not worry, your content will not be lost!
- Step 6 - Then simply upload the newest arrowtic.zip” file in the Appearance > Themes section. Click on the Install Themes tab at the top and choose to upload the zip file. You have this step explained in section: Theme Installation via WordPress.
2.Update theme via FTP
Updating the theme via FTP is very similar to the install process via FTP. Follow the steps below to update your theme via FTP:
- Step 1 - Go to .../wp-content > themes location on your server using a FTP client and backup your "arrowtic" theme folder by saving it to your computer, or you can choose to simply delete it. Your content will not be lost.
- Step 2 - Download the new version of arrowtic theme from your Themeforest and retrieve arrowtic folder by unpacking the zip that you download from Themeforest and arrowtic.zip.
- Step 3 - Then simply drag and drop the new "arrowtic" theme folder into .../wp-content > themes location. Choose to “Replace” the current one if you did not delete it.
- Step 4 - Log into your WordPress Dashboard, go to Appearance > Themes and activate the new arrowtic theme.
# How to create Child Theme
What is a Child Theme?
A child theme is a theme that inherits the functionality of another theme, called the parent theme. Child themes allow you to modify, or add to the functionality of that parent theme. A child theme is the best, safest, and easiest way to modify an existing theme, whether you want to make a few tiny changes or extensive changes. Instead of modifying the theme files directly, you can create a child theme and override within.
Why use a Child Theme?
if you modify an existing theme and it is updated, your changes will be lost. With a child theme, you can update the parent theme (which might be important for security or functionality) and still keep your changes. It’s a great way to get started if you are just learning WordPress theme development.
- Follow that documentation to create Child Theme Child Themes - Codex
- Using that plugin to create Child Theme One Click Child Theme
You need to use a Child Theme only if you are making code customizations.
Thanks for reading!